Your First Route
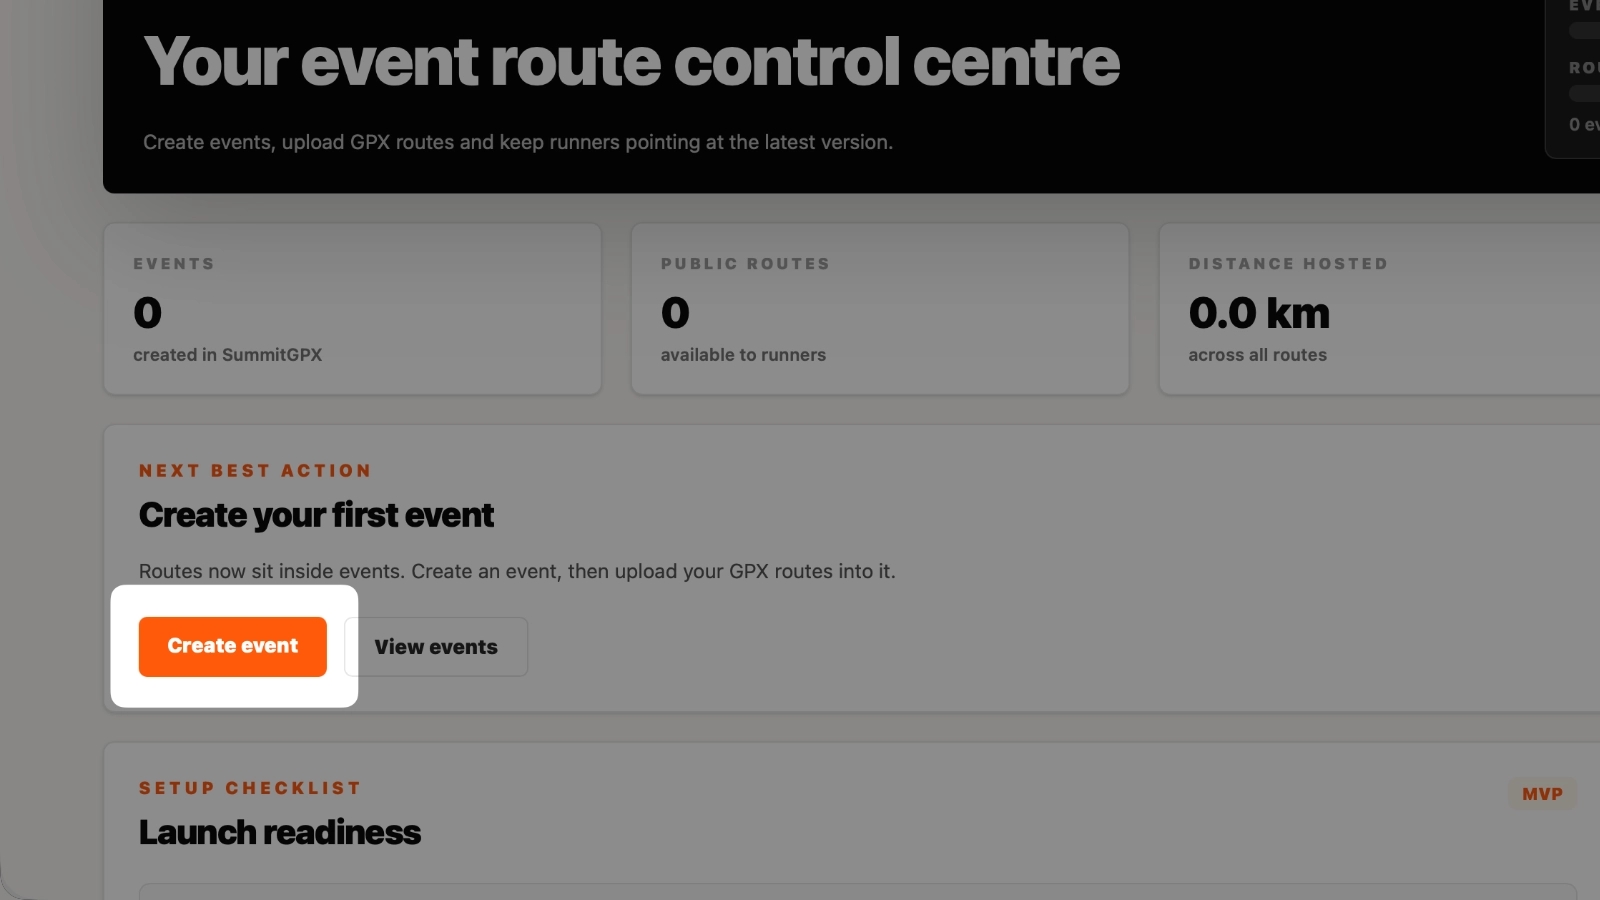
Create an Event
From your dashboard, click Create Event and enter your event details.
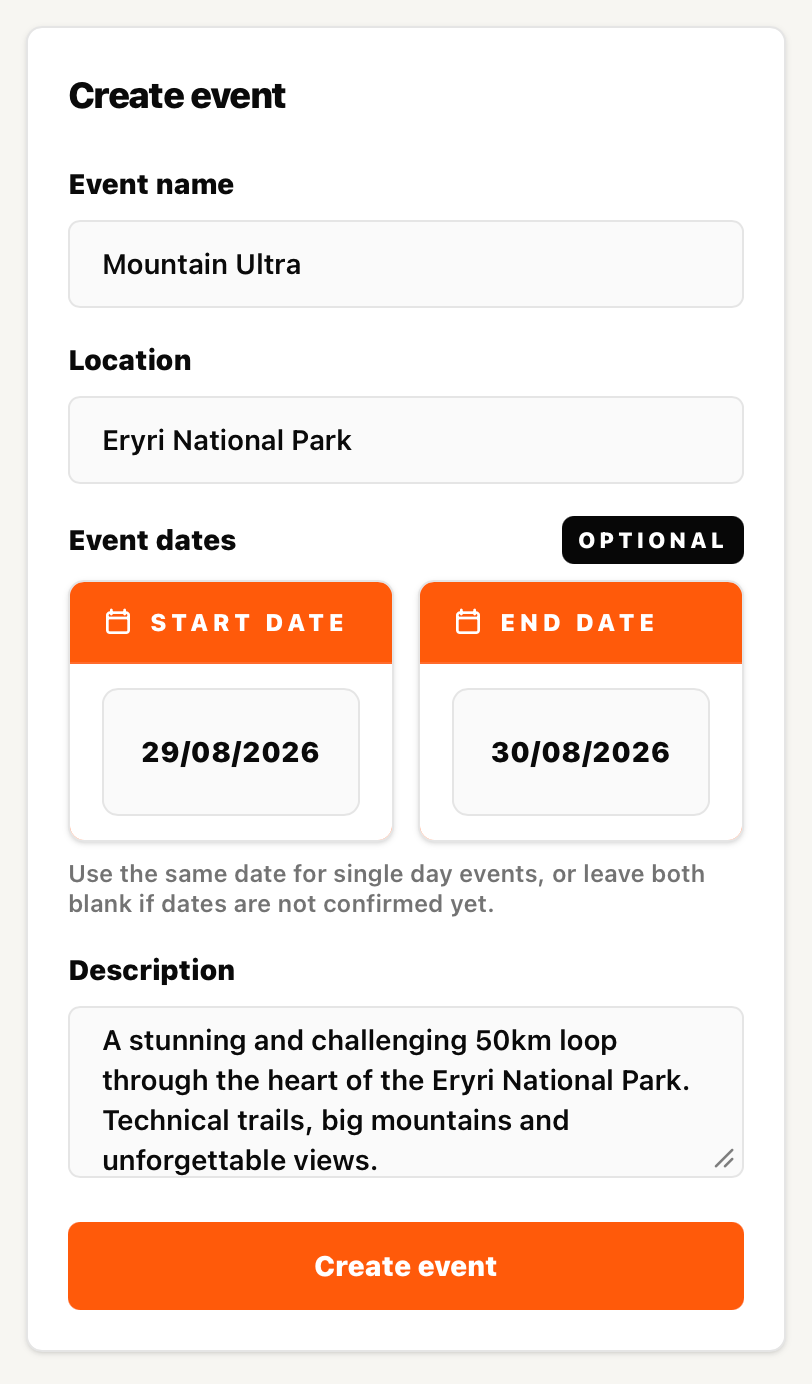
Complete the Event Details
Enter the event name and any additional information required.
Save the event to continue.
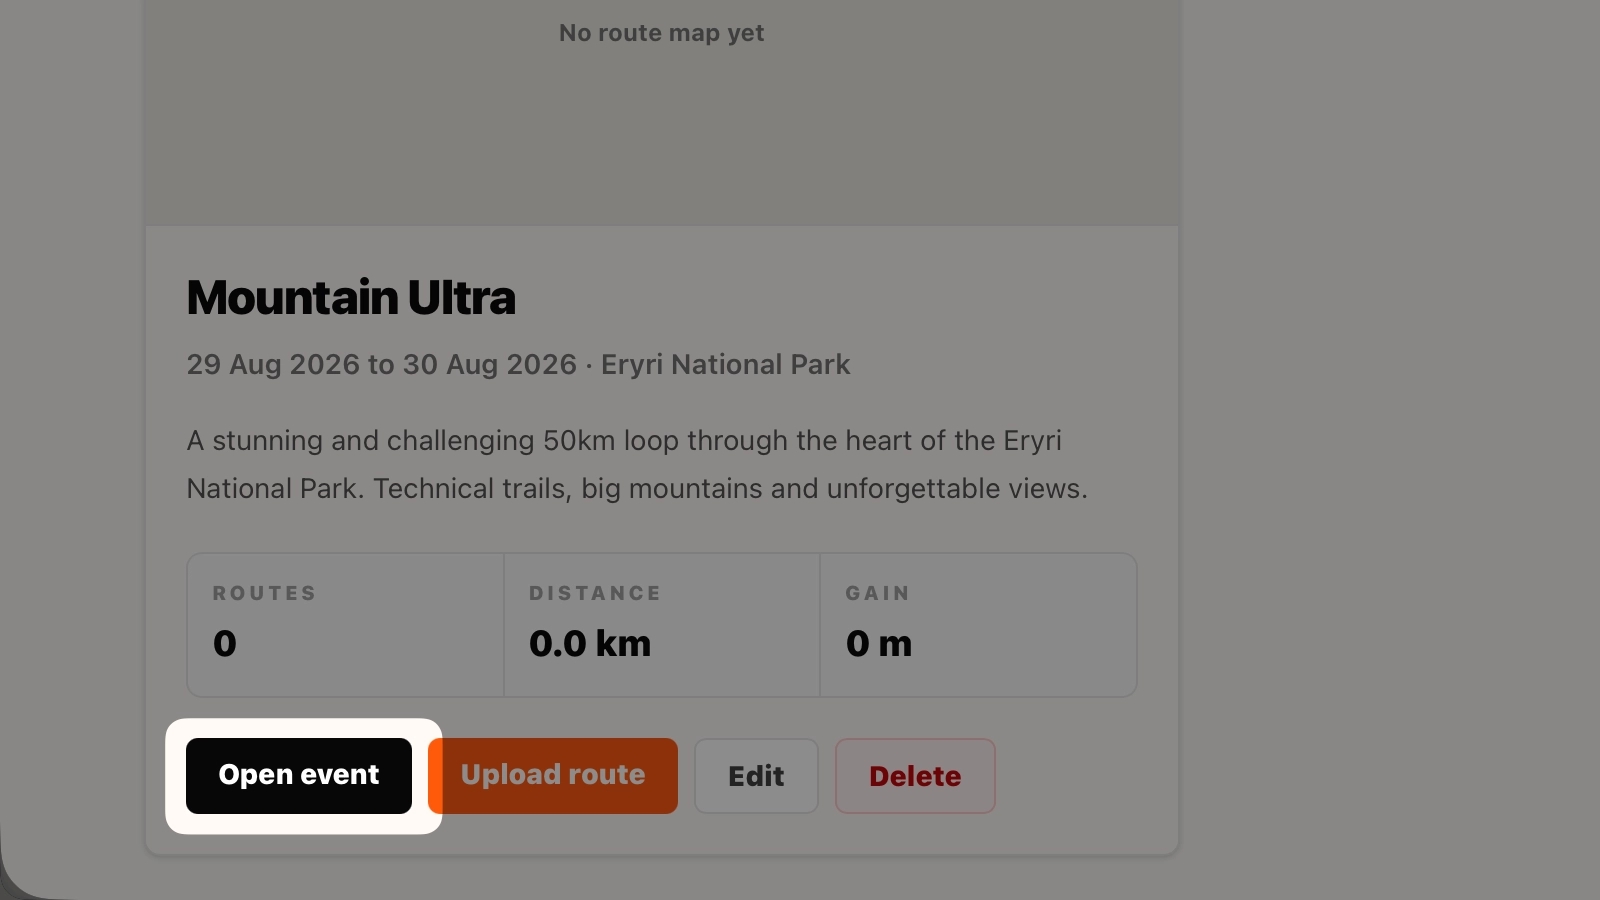
Open Your Event
Once the event has been created, open it from your Event Library.
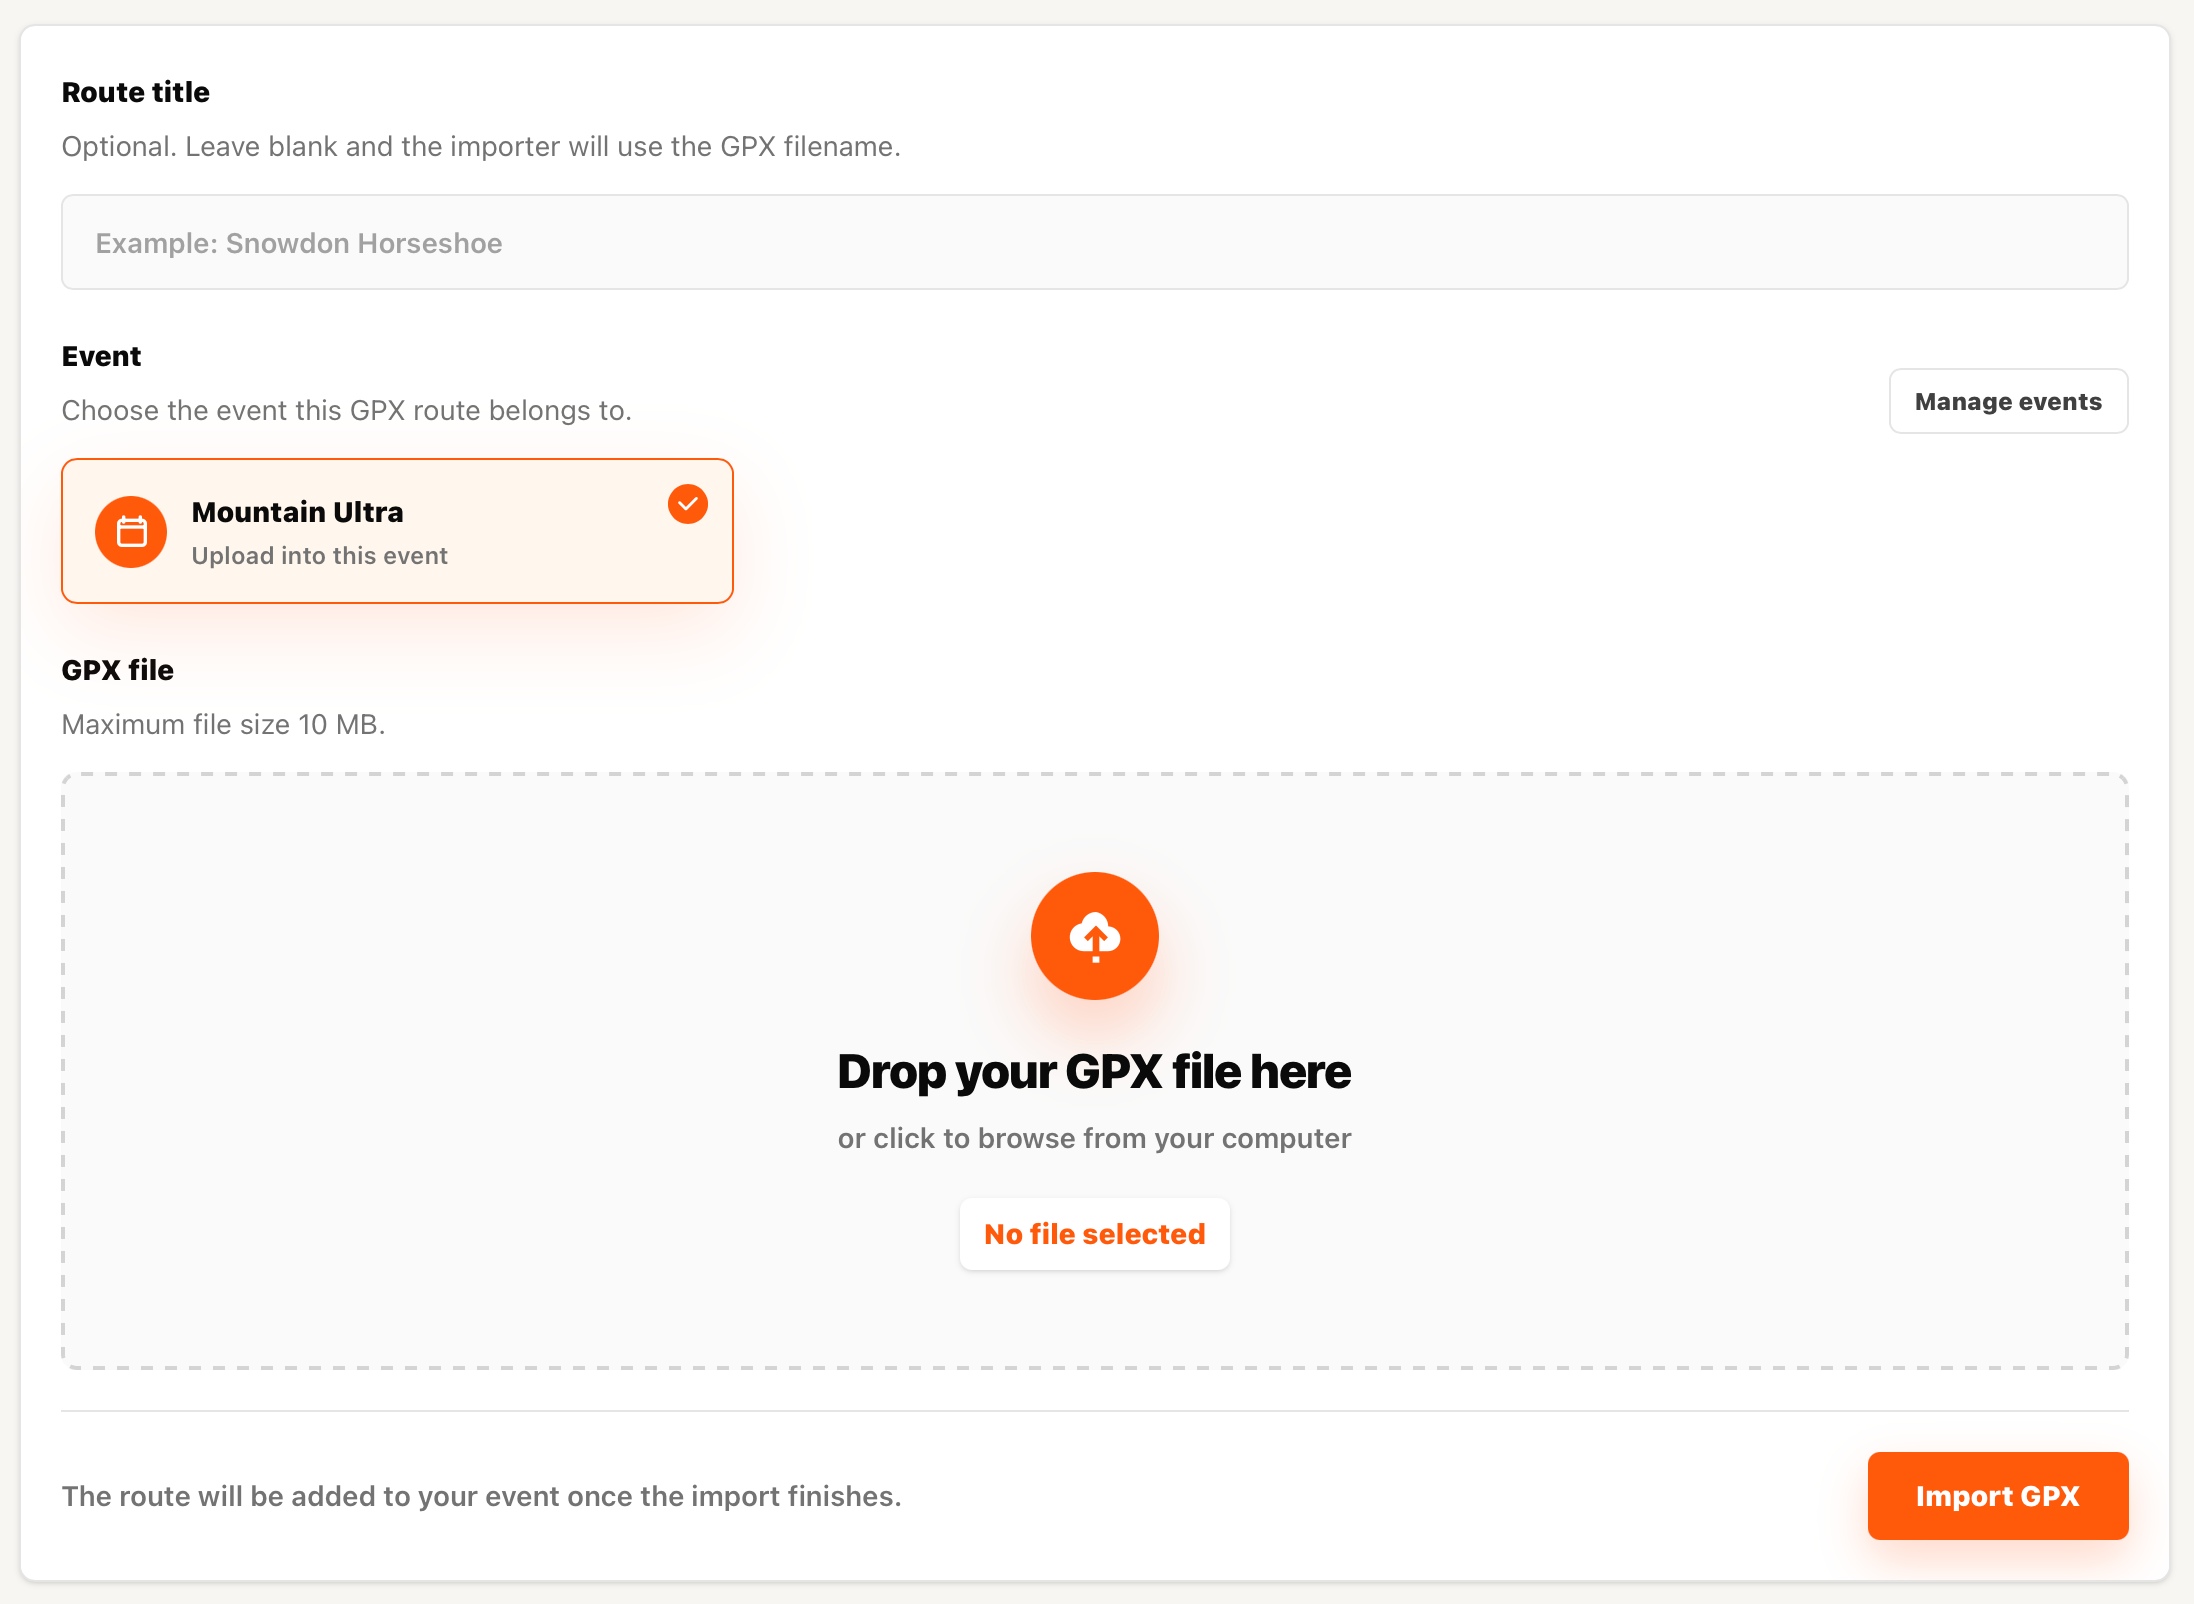
Upload a Route
Within the event, click the Upload GPX to this event button and either drag or drop your GPX file or browse your computer to locate it.
SummitGPX will process the route and generate:
- Interactive route map
- Elevation profile
- Route statistics
- Public route page
Click the Import GPX button.
Your GPX file will import.
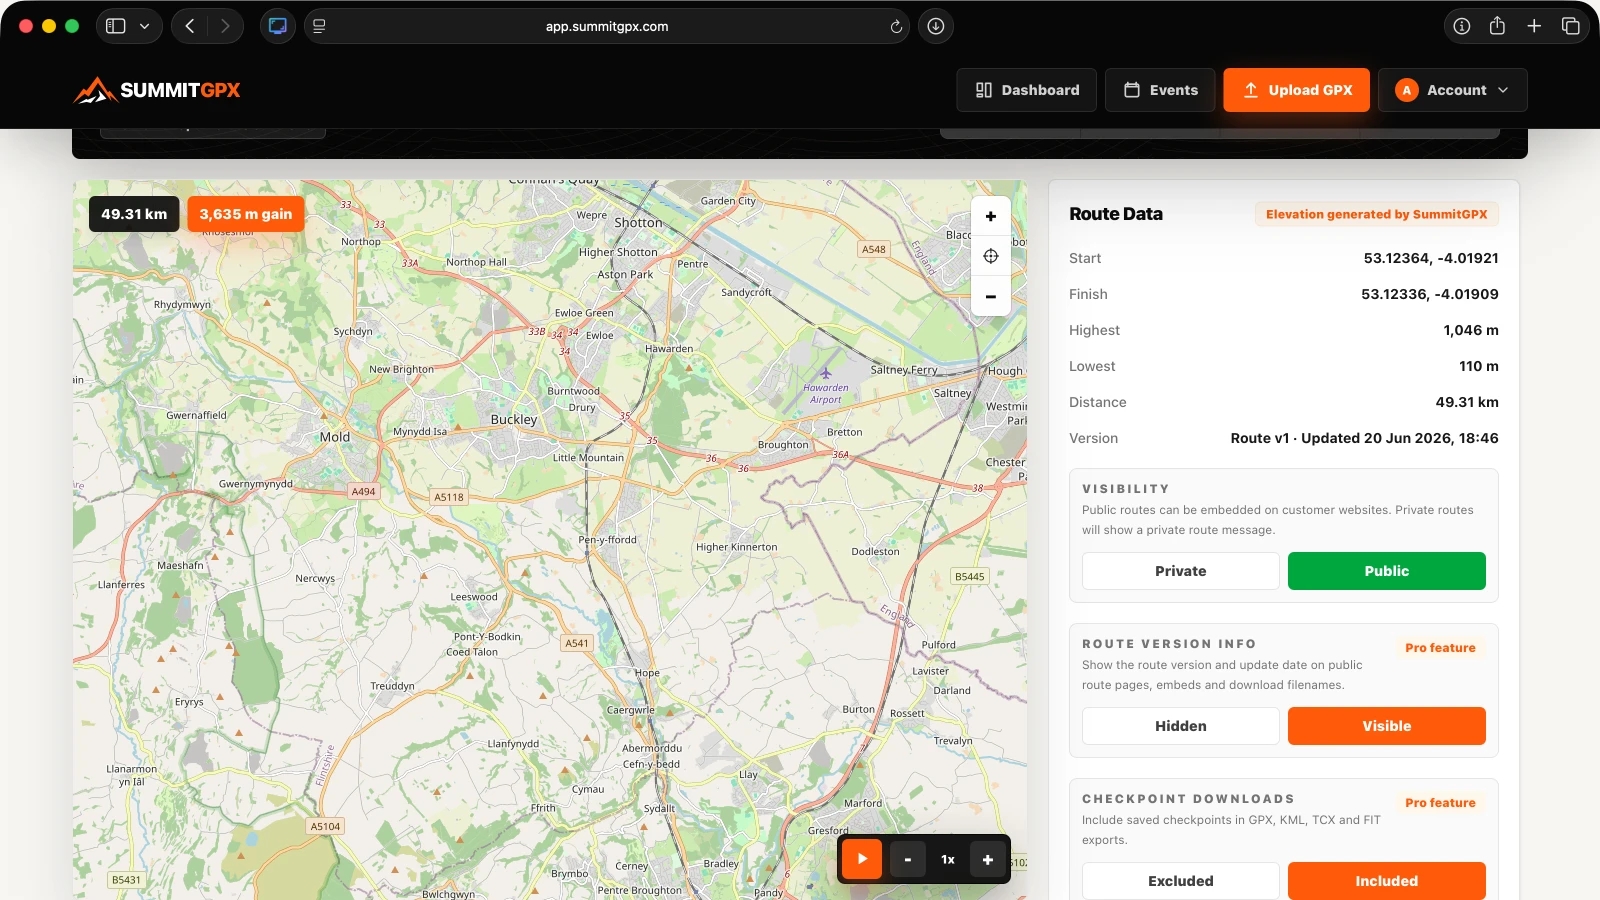
Click on the View route button once the import has completed.
Review the Route
Check the route map, distance, elevation data and route details.
If required, you can update the route later without changing the public link or QR code.
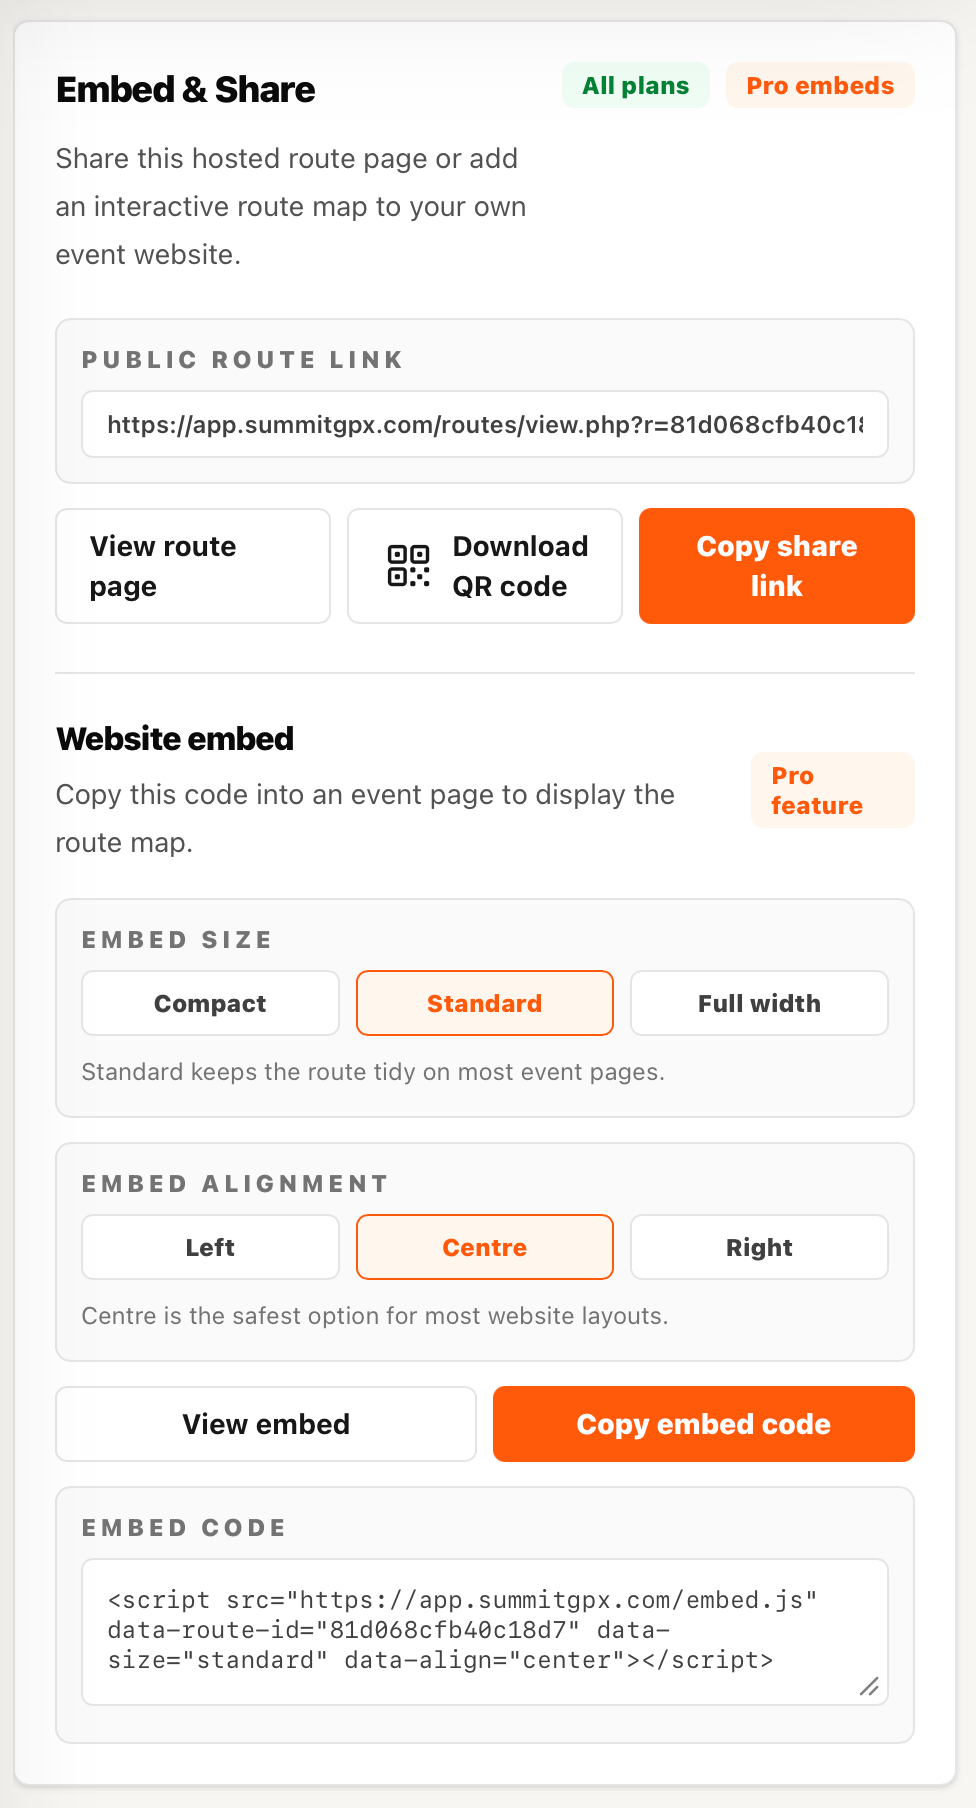
Share With Runners
Once you’re happy with the route, share the public route page or download the route QR code for use on websites, race packs and signage.