 SummitGPX Help Centre
Route features
Checkpoints
Add aid stations, route notes and GPS/watch points, then review their placement.
Starter and Pro include checkpoint management, checkpoint-enabled downloads, route PDFs and checkpoint CSV exports. Free provides basic checkpoint display.
Use checkpoints for aid stations, water, cut-offs, summits, crew access or hazards. The current Starter and Pro plans include checkpoint management; Free provides basic checkpoint display. Points can appear on the map and profile without appearing in watch downloads.
Add checkpoints quickly
- Open the route and expand Checkpoints.
- Choose Quick add checkpoints.
- Click the route at the checkpoint location. Add a name if useful.
- Choose Save and add next, then click the next location.
- Choose Finish quick add when done.
Blank short labels receive the next available C-number. For a single point, enter its name, choose Click route to place checkpoint, click the route and choose Save checkpoint. Placement snaps to a recorded course point; inspect the exact position, especially on loops.

Add details and marker settings
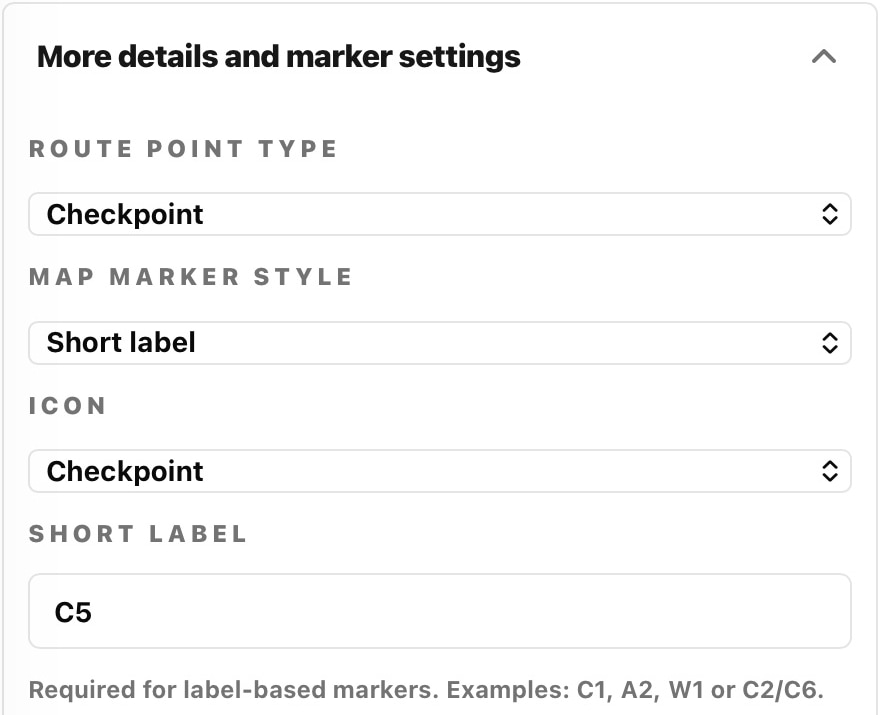
Expand More details and marker settings to choose a route point type, marker style, icon, short label, location and details. The section starts collapsed on each fresh page load and keeps your open/closed choice during that page’s lifetime, including saves and Quick add changes.
- Name: a useful full name, such as “Lakeside aid station”.
- Short label: a compact marker such as C1 or W2. Use consistent numbering.
- Location and details: recognisable place name, food/water, crew restrictions or cut-off information.
- Marker style and icon: use a label, icon or both for checkpoints, facilities and hazards.
- Show on GPS/watch and Device point type: choose whether and how this point appears in supported device files.
Edit, move or remove a point
Use the checkpoint’s edit controls to change its information. Moving a marker snaps it to the route and updates distance and elevation; follow the movement controls and use the offered undo if needed. Deleting a checkpoint removes the marker, not the route line. Review the Checkpoint breakdown after changes.
Imported waypoints and replacement files
Initial GPX imports can add suitable named waypoints. Generic navigation points and large sets are skipped. Review imported positions and labels before sharing. Replacement GPX waypoints are not imported as additional checkpoints; your existing checkpoint records are retained. Review them after any edit, reversal or restore.
Control device downloads
The route-level Checkpoint downloads setting is the master control for main route downloads. Each point’s Show on GPS/watch setting selects the points to include. Map-only notes remain useful on the public page without filling a watch with unnecessary markers. See download formats and split-file behaviour.

If a save is uncertain
If the page says the save result could not be confirmed, reload and check whether the point exists before adding it again. If the course version changed while the page was open, reload the current route before placing more points.